Cinematic Runtime Add-On
Important
This article is about the Cinematic Editor with cross-platform support. For the Cinematic Editor extension which uses the Bedrock Editor engine, see Cinematic Editor extension.
The Cinematic Runtime is an Add-On allows players to play a scene by sending scene data from Cinematic Editor in the release version of Minecraft.
The Cinematic Runtime add-on is part of the Cinematic Editor extension, a Minecraft editor add-on which utilizing the /camera command for changing perspectives and designing cinematic scenes. The editor has the capability to control your camera perspective with Minecraft Bedrock Editor to allow players to make a Minecraft scene, without knowledge to use the /camera command.
This is made possible through exporting the scene data from the editor extension to another add-on. And the data is saved in world storage, so the scene can still be played when rejoining without the need to import the data again.
The video above showcase how you can export keyframes from the editor and import the data and play a scene in a normal Minecraft world.
Import Scene from Editor to World
In the video, it showcased the extension has the capability to transfer a scene data to the runtime Add-On. Here's how you do it:
-
Apply both Cinematic Editor Extension and Cinematic Runtime Add-On to an Editor project.
-
Create a scene in the Editor UI, then press the Export Scene button.
-
Either using Test World feature or export the project as world in world settings to convert an Editor project to normal world.
-
Enter the world, and type the following command:
/function cinematic/editor
Creating a Scene
The runtime add-on now supports creating and editing a Minecraft scene without the Editor, by sacrificing the fancy UI given by Minecraft Editor engine.
Start by running the following command:
/function cinematic/editor
When executed, this form should appear when you have not created a scene:
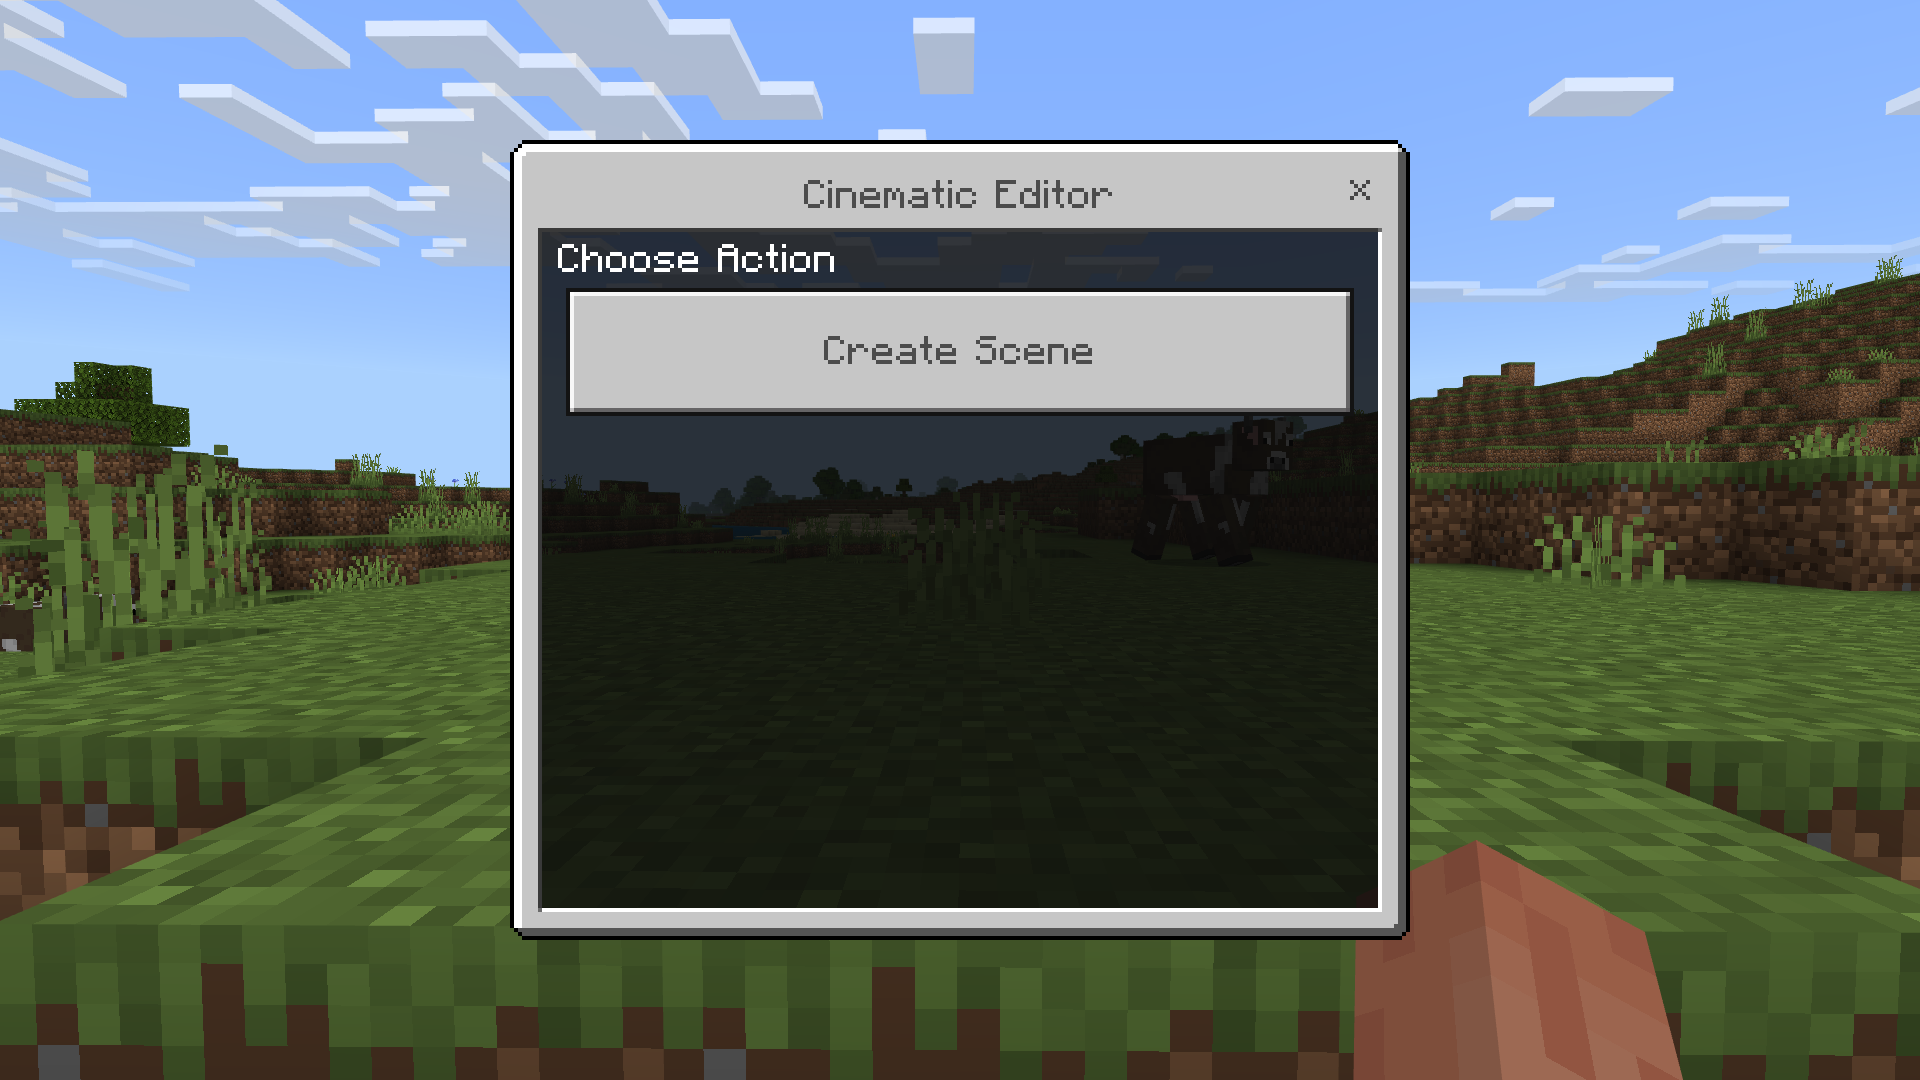
Scene Editor Mode
After pressing the create scene button, you will enter Scene Editor mode. There will be 3 items in your hotbar, and your whole inventory will be cleared until you exit scene editor mode:
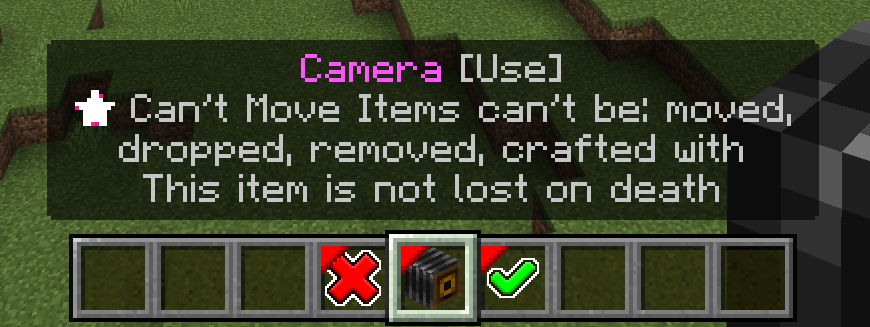
Exit without saving scene
Exits scene editor without saving the scene using the Cancel item.
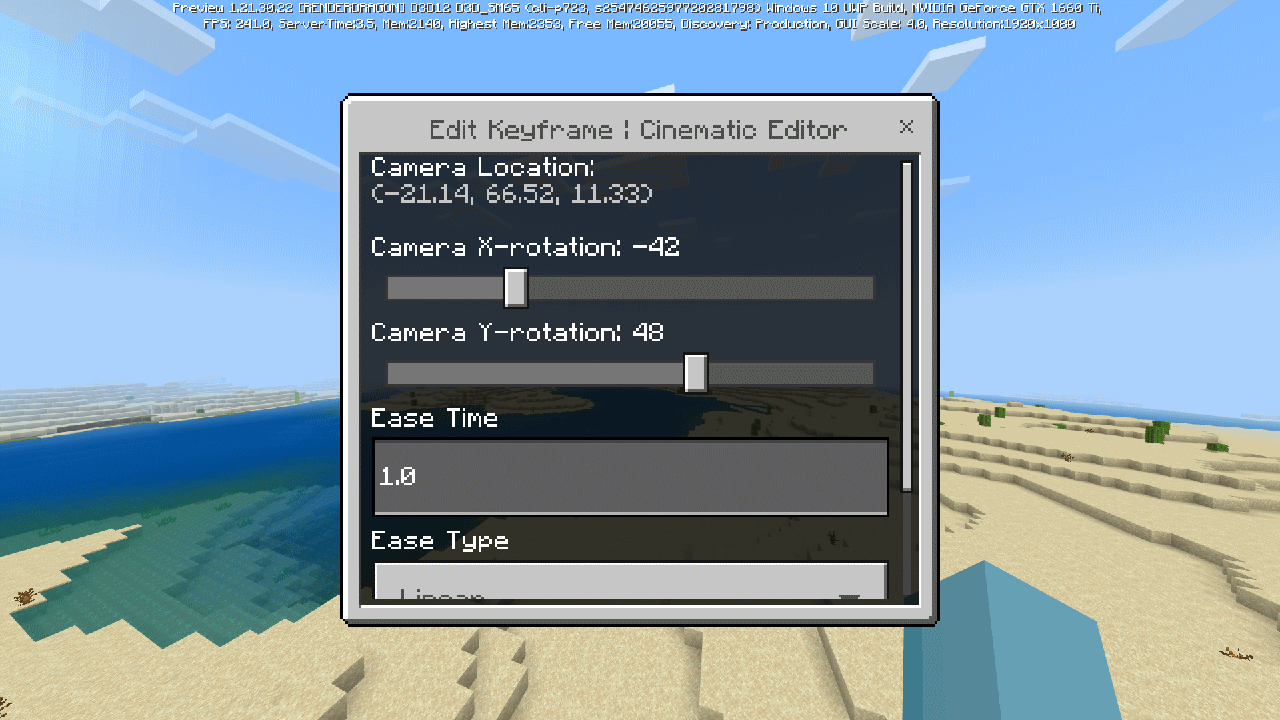
Create keyframe
Create a keyframe using the camera item. Not to be confused with Minecraft's camera item.
When using this item a keyframe will be saved temperatory to a scene.
It will also asks you to set values of ease type and ease time, which you can change it later after exiting scene editor mode.
Saving Scene
Using the Confirm item will save the scene to the world.
Edit Existing Scene
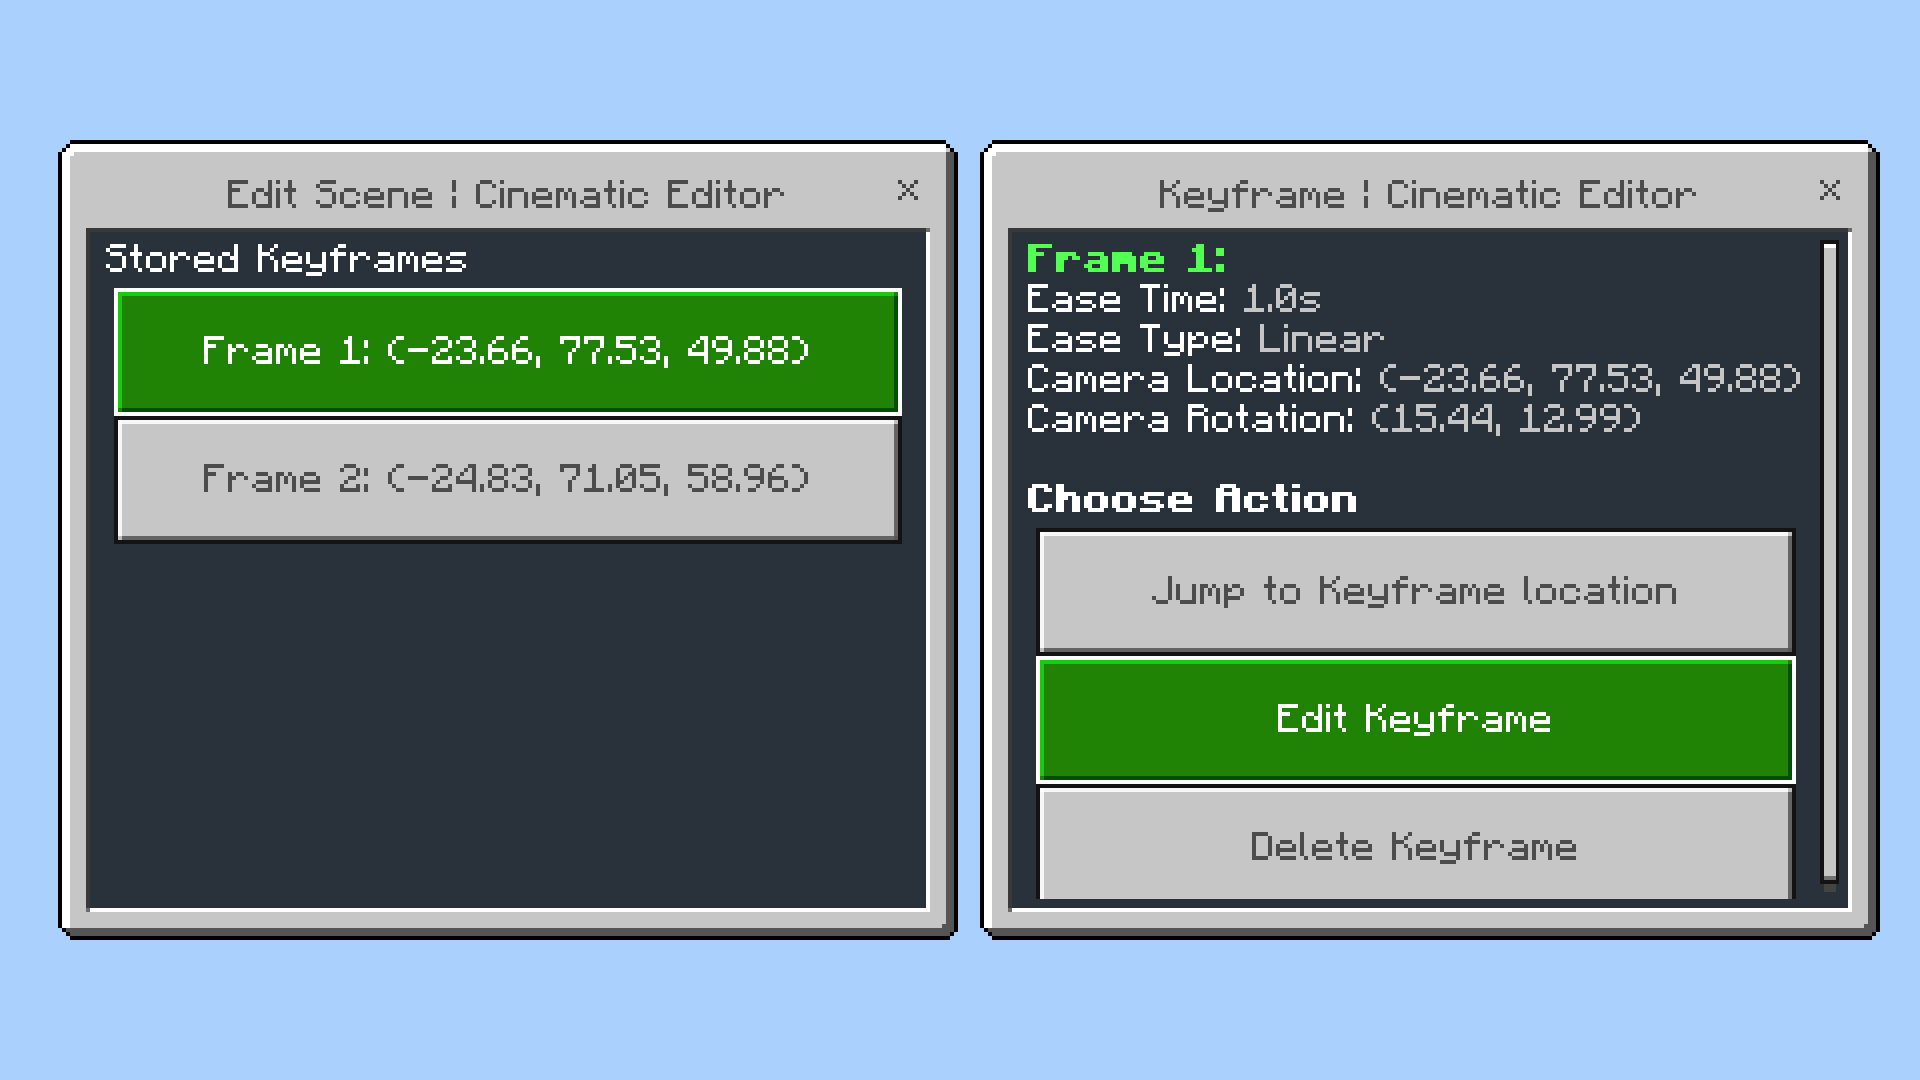
Once you have created an existing scene and when you decide to edit that scene, enter /function cinematic/editor command and you will be greeted with different panel:
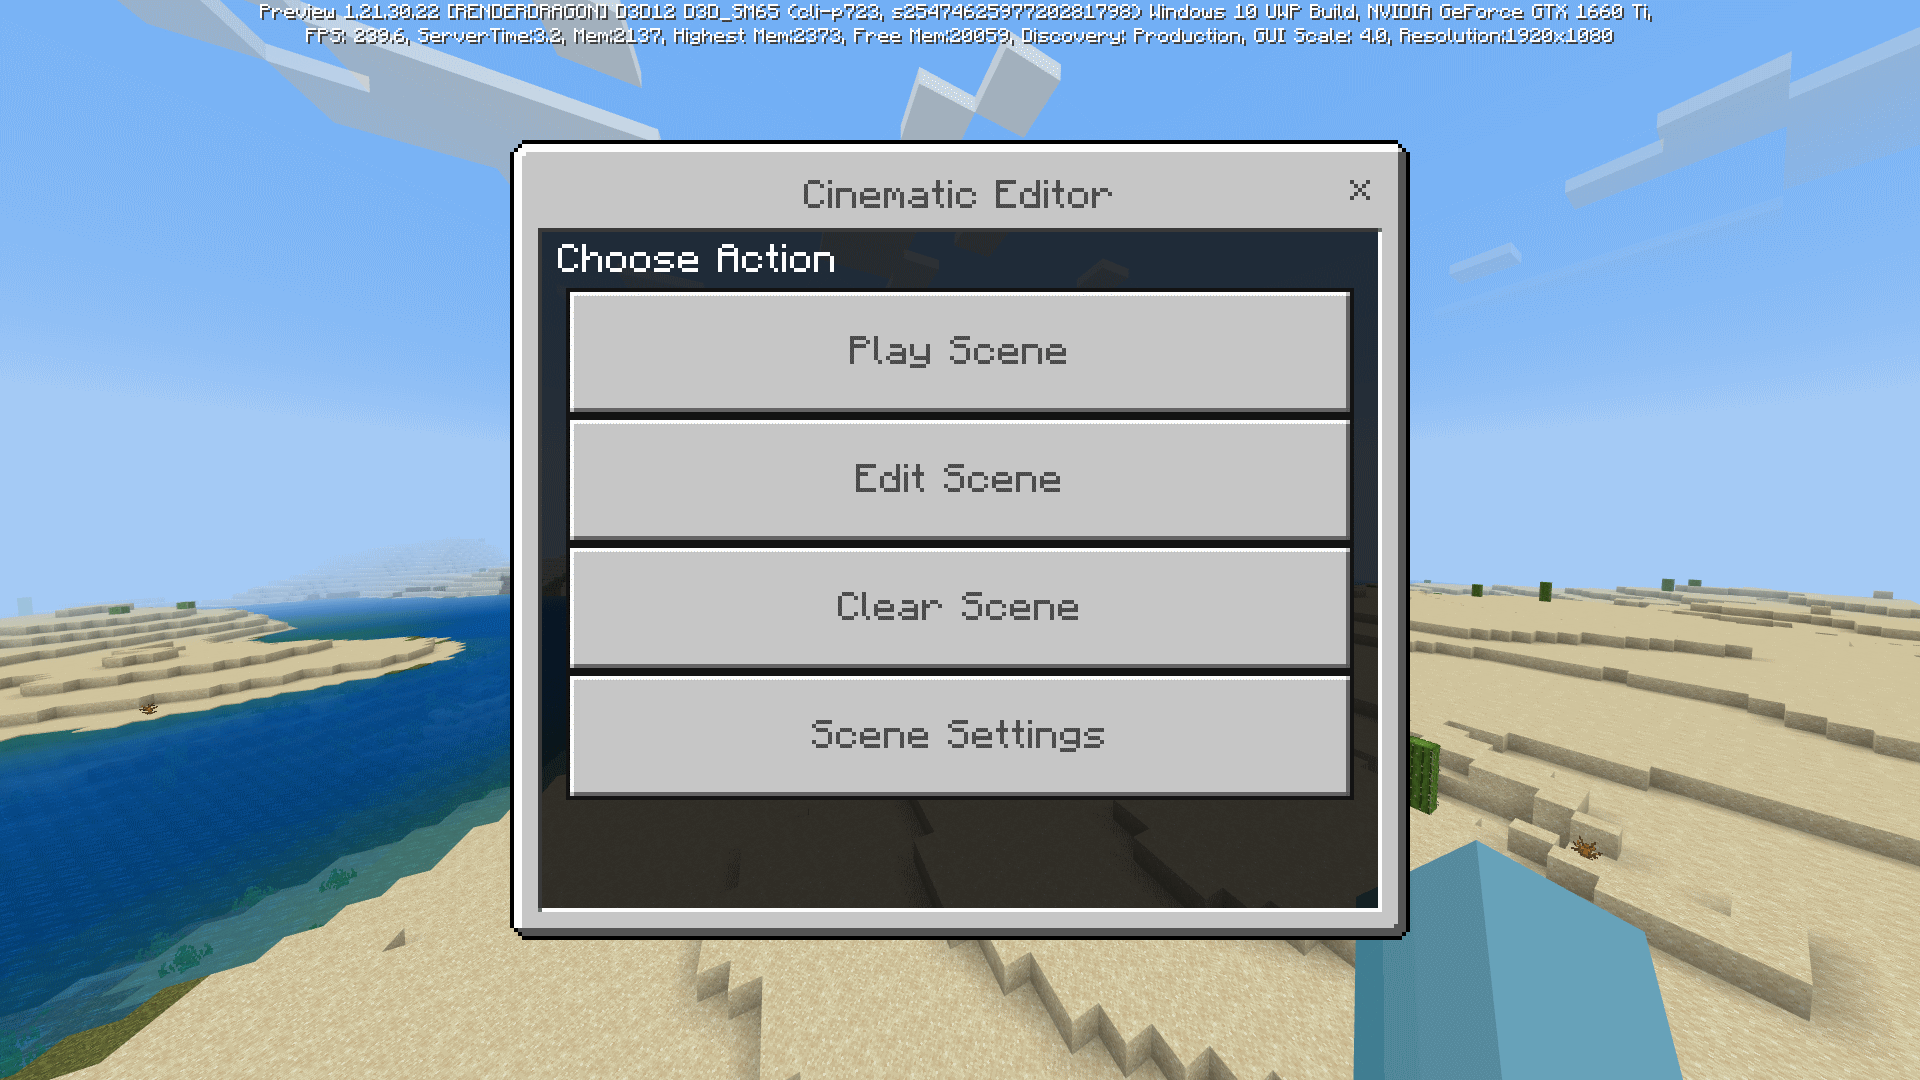
Select a keyframe then select Edit Keyframe, which brings you back to the form seen in Create Keyframe.
You can also delete a keyframe from existing scene.
Scene Settings
This screen controls the HUD visibility when playing a scene using the Runtime Add-On.
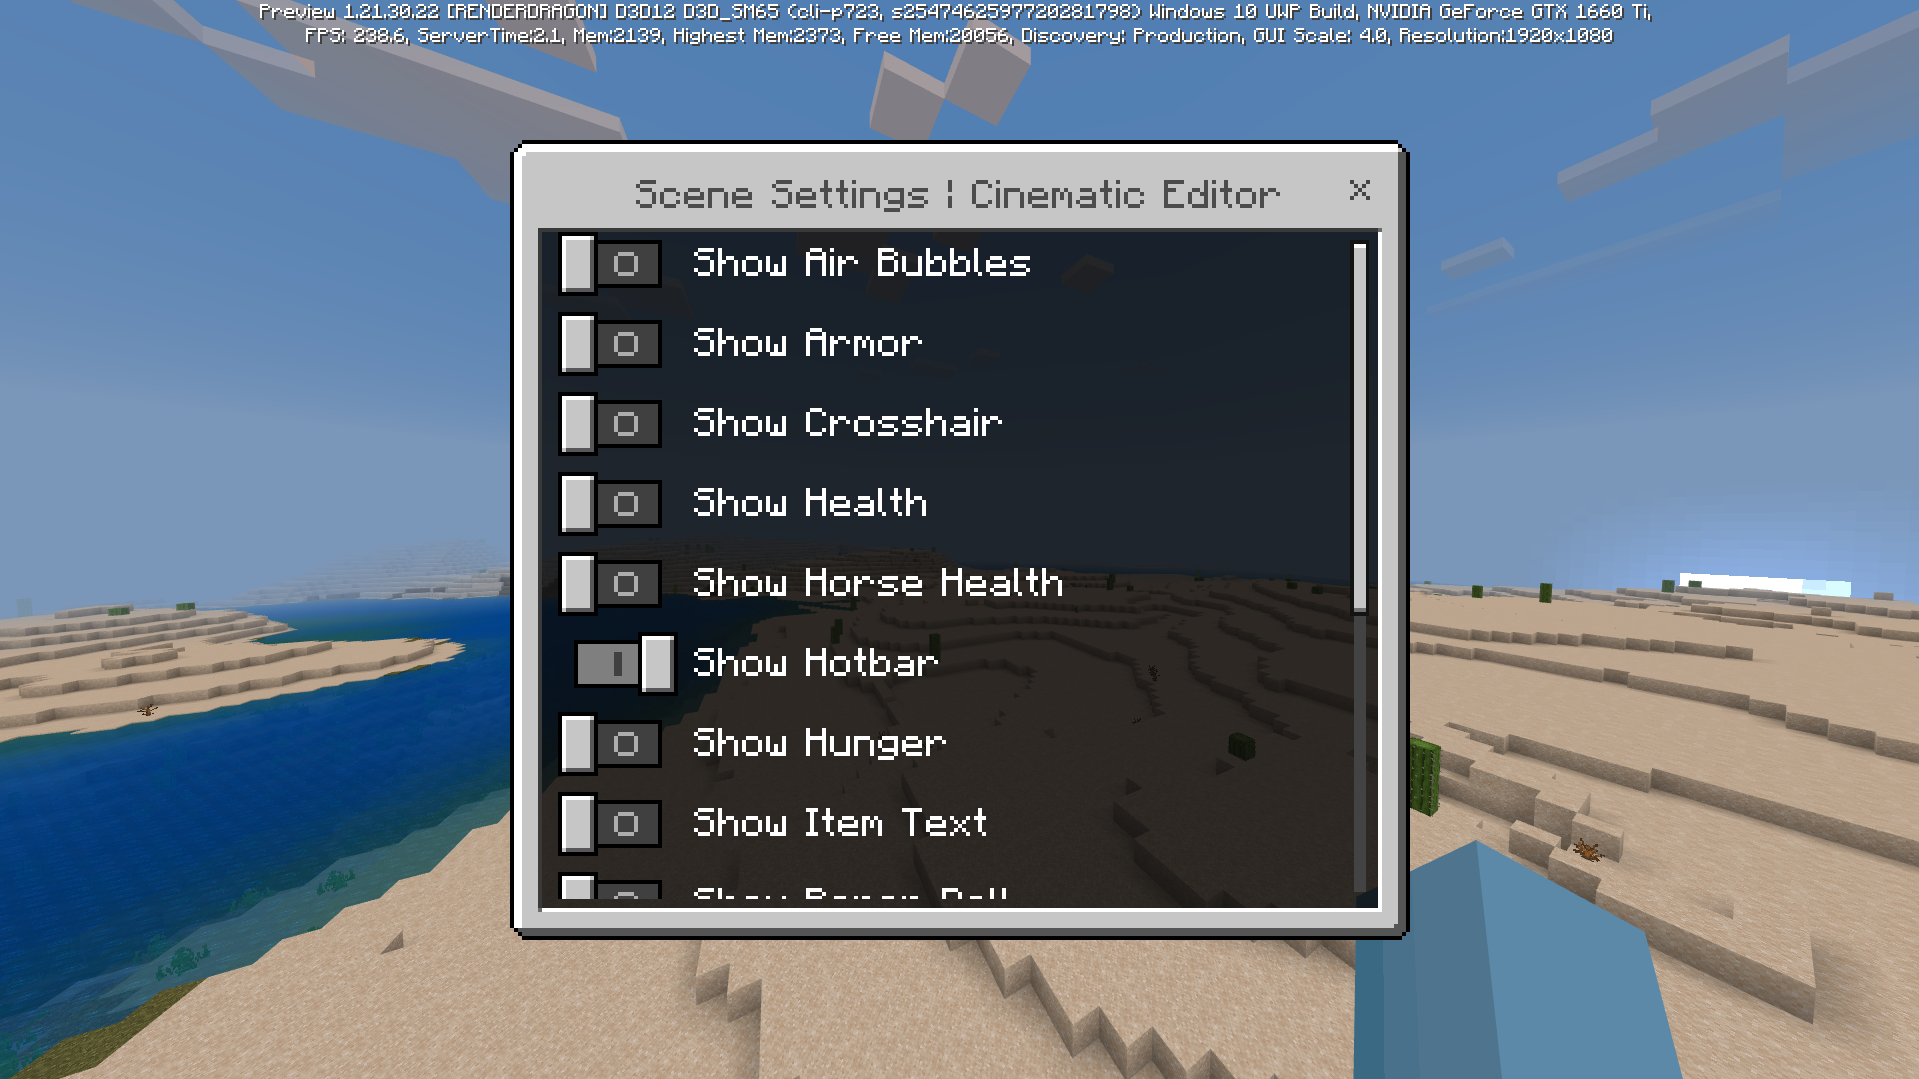
Show Hunger- Shows hunger bar element.Show Paper Doll- Shows'paper doll' on-screen representation of the player.Show Armor- Shows armor element on the HUD.Show Tool Tips- Shows tool tip elements of the HUD.Show Touch Controls- Shows touch controls elements of the HUD. Depending on the players' platform, these elements may never show up.Show Cross Hair- Shows cross-hair section of the HUD.Show Hotbar- Shows hotbar inventory area element of the HUD.Show Health- Shows health element of the HUD.Show Progress Bar- Shows progress bar element of the HUD.Show Air Bubbles- Shows air bubble status element of the HUD.Show Horse Health- Shows visual representation of the players' ride element of the HUD.Show Status Effects- Shows status effects element of the HUD.Show Item Text- Shows item text element.
Changelog
Changelog for Cinematic Runtime Add-On
1.0.1
- Added support for using Cinematic Editor extension in Minecraft v1.21.130 or above.
1.0.0
- Scenes exported from Cinematic Editor extension V2 are now compatible with this add-on.
- New "Interpolation" dropdown with Line and Hermite options
- Spline Subdivisions setting (2-20) for controlling smoothness vs performance
0.5.1
- Better error handling
- Various bug fixes
0.5.0
- Added support to import HUD visibility settings from editor extension.
- Added 'Scene Settings' screen accessible from
/function cinematic/editorcommand. Allows changing HUD visibility when playing a scene within runtime addon. - Added ability to edit camera rotation on existing keyframes.
- Added Camera item once a scene is created via runtime addon.
- Add-on now doesn't require Beta APIs experiment.
- Add-on is now compatible with Minecraft v1.21.20 or above.
0.4.2
- Fix a packaging issue where resource pack and behavior pack are split as multiple
.mcpackfiles. - Updated manifest
- Resource pack now requires the same minimum engine version as behavior pack.
0.4.1
- Add-On is compatible with Minecraft 1.21.20 Previews
0.4.0
-
You can now create and modify the scene within the Cinematic Runtime Add-On, alternative to Cinematic Editor Extension.
Note
- This feature is made mainly to support creators without Minecraft for Windows to make a scene.
- For detailed usage of this feature, please check the post.
-
Added
/function cinematic/editorcommand - Opens an editor for creating and modifying a Minecraft scene. -
Renamed 'Camera Runtime' item to 'Scene Player'
-
Updated Add-On Manifest metadata, changing license from MIT to All Rights Reserved.
-
Add-On now supports Minecraft v1.20.80, v1.21.0 and v1.21.10
0.3.0
- Module version property is now the same as
header.version - Editor extension is now compatible with 1.20.80-preview.21 or above.
- Using '@minecraft/math' module instead of Vector class from '@minecraft/server'
- Output files are now bundled.
0.2.1
- Pack is now compatible with 1.20.80 previews only
0.2.0
- Pack is now compatible with 1.20.70 previews only
- Runtime add-on now requires Beta APIs experiment
- HUD is now hidden when using camera runtime until scene ends
0.1.1
- Fix a critical bug where world hangs when 'Run Timeline' is pressed.
0.1.0
- Initial Release for Release 1.20.50
- Added input form
- Added an item that plays a scene when used
Installation
Important
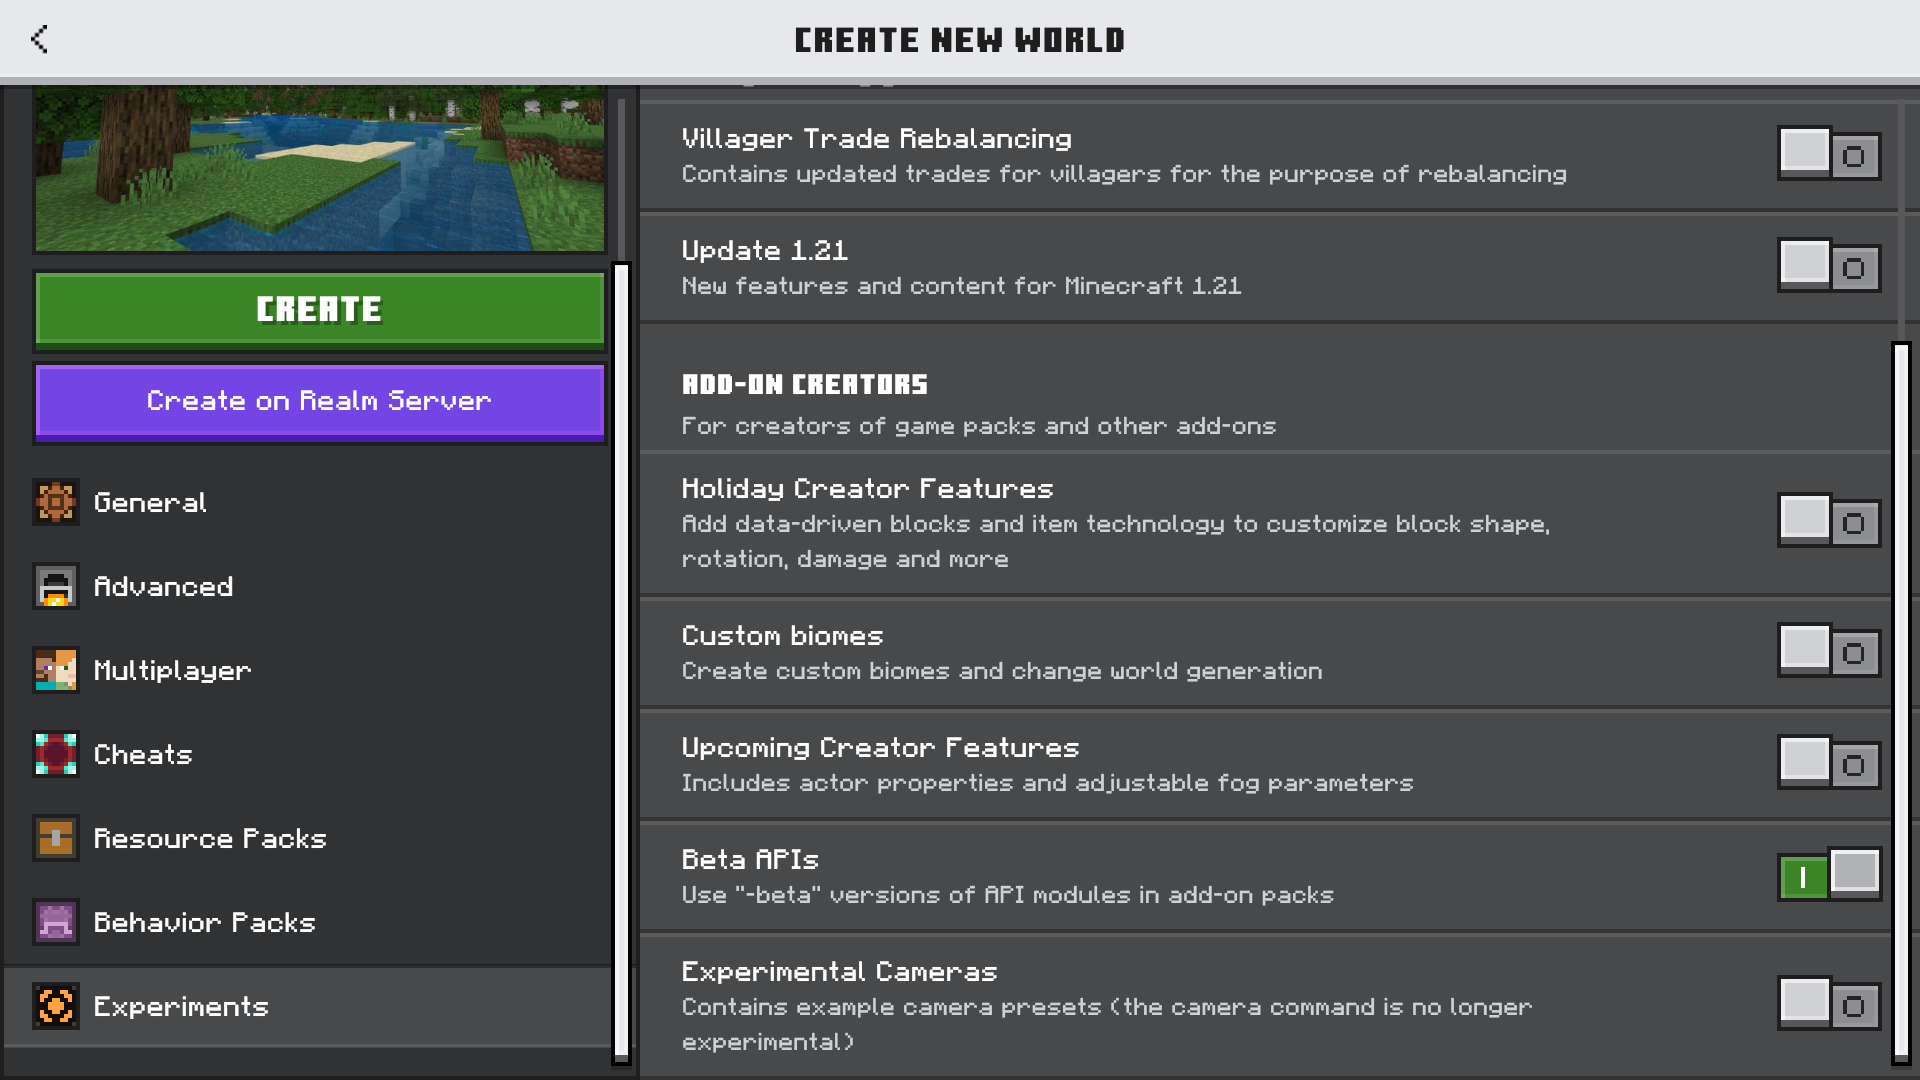
Cinematic Editor Runtime Add-On for Minecraft v1.21.0 requires Beta APIs experiment enabled.
Important
You are allowed to repost this add-on to other websites or make a YouTube video for commercial purposes, provided that you must put the link this post https://jaylydev.github.io/posts/cinematic-editor/ in the description of the video or a webpage and must not have any other direct-download links.
Downloads
Click the link below and choose a version to download.