Minecraft Cinematic Editor Extension
Important
This article is about the Minecraft Editor extension that is currently exclusive to the Windows version of Minecraft Bedrock.
For the Cinematic add-on with cross-platform support, see Cinematic Runtime Add-On.
Cinematic Editor is a Bedrock editor extension that utilizing the /camera command for changing perspectives and designing cinematic scenes.
The editor controls your camera perspective with Minecraft Editor to allow players to make a Minecraft scene, without knowledge to use the /camera command.
The Cinematic Editor Extension allows you to control your camera perspective without the use of commands. Which uses Minecraft: Bedrock Editor and the /camera command to allow players to make a Minecraft scene.
Examples of Minecraft scenes made with the Cinematic Editor
By: Jayly (me)
Supported features
The following is a brief overview of the features supported by the Cinematic Editor:
- Create and manage keyframes
- Adjust camera position and rotation
- Control camera transitions (easing)
- Control camera interpolation (linear and hermite)
- Add keyframe effects (fade in/out)
- Export scene for use in the Cinematic Runtime Add-On (Currently not supported for Cinematic Editor V2)
What's Next
Looking ahead, here's a list of features I wanted to include in future releases.
- Play multiple sequences one after the other until the scene is finished
- Change camera FOV support
- Export scene for use in the Cinematic Runtime Add-On
- Manage scene using Custom Commands API
Creating a Scene
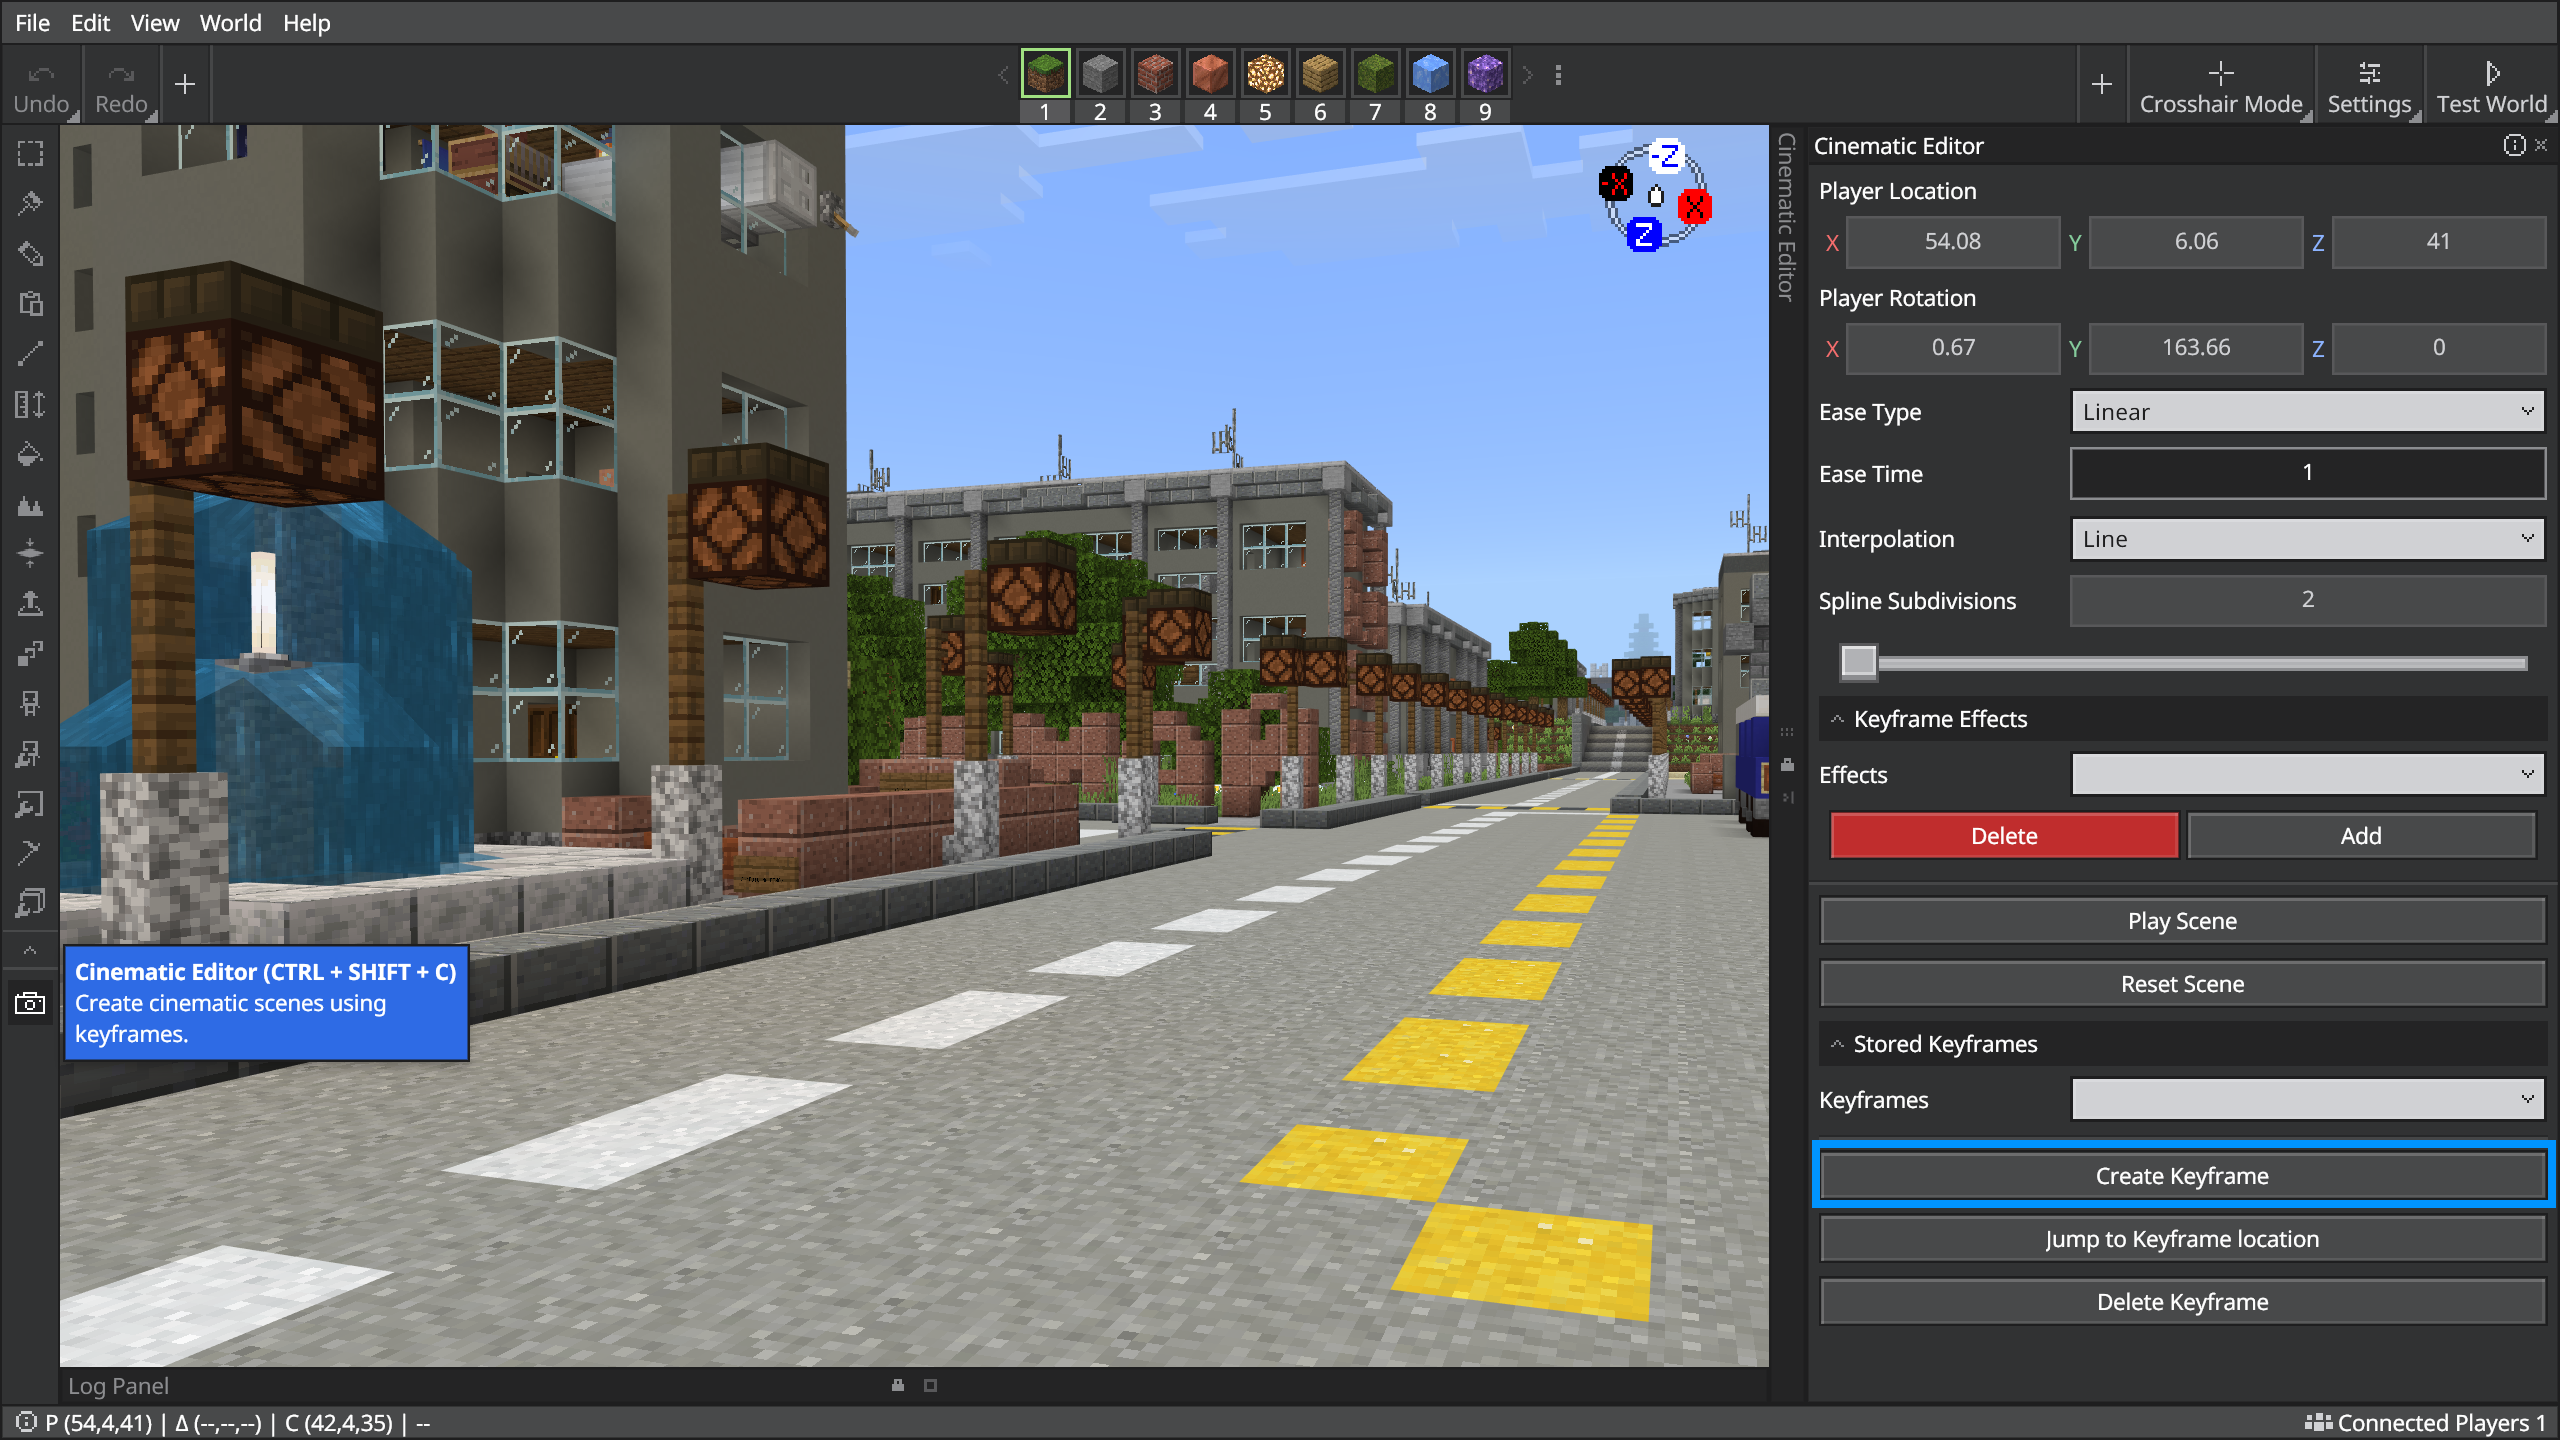
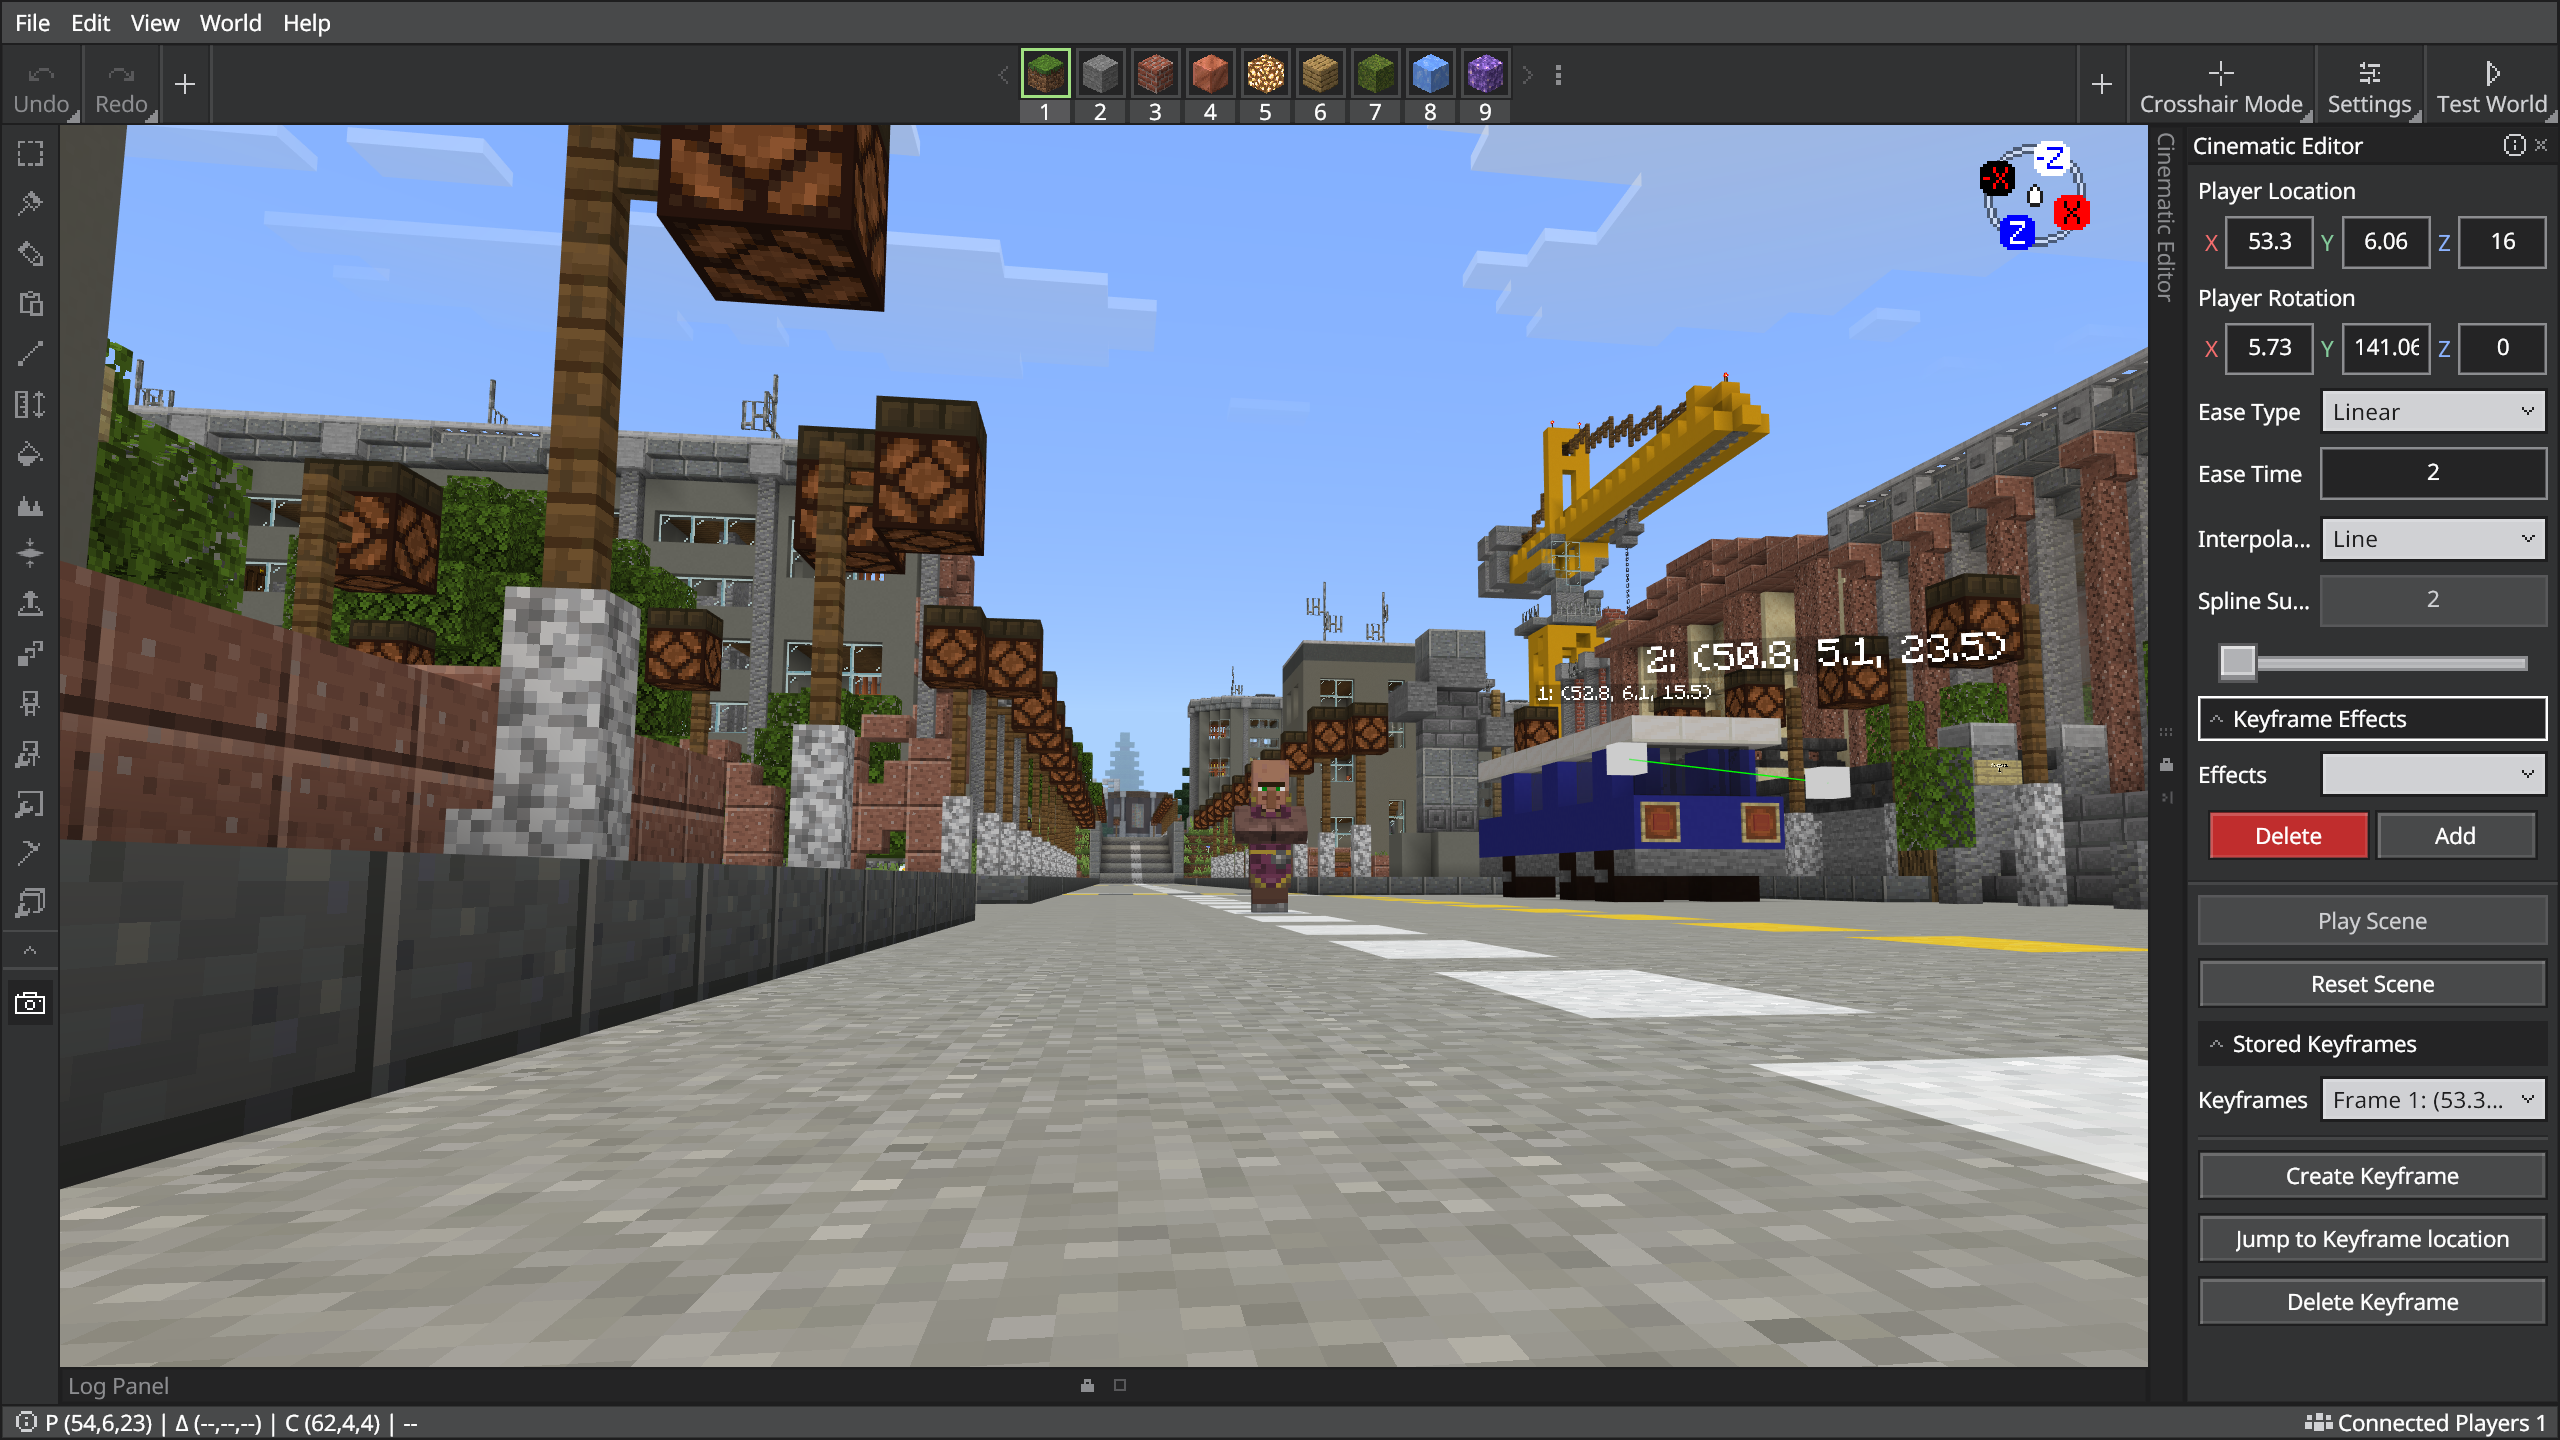
To create a scene with the editor extension, first click on the camera icon on the left. The cinematic editor panel will pop up on the right, scroll down to the Stored Keyframes section. This is where you will create a keyframe and a scene.
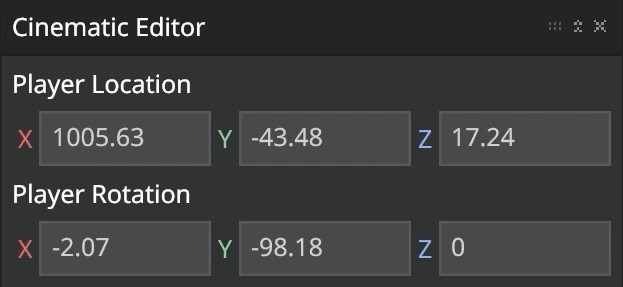
The 'Create Keyframe' button will immediately saves the player's current coordinates and rotation into the extension, which can be viewed within the top part of the extension:
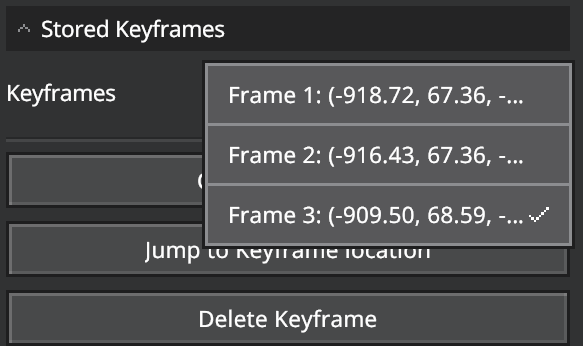
When the button is clicked, the keyframes dropdown will have an item with the location the keyframe is captured in. Doing this multiple times allows you to create a scene. The keyframes order are shown in the dropdown:
When the 'Play Scene' button is clicked, the editor extension controls your camera and gets all the keyframes saved to generate a path for the camera to transit from one location to another.
Note
The extension will only take control of the camera to run a scene given by there are data in the stored keyframes dropdown.
Camera Transition
The camera can move between keyframes with easing snd interpolation.
Easing
Easing is a specific method of controlling the rate and curve of that interpolation, typically to create natural-looking motion between 2 keyframes. If you wish, you can also use instant easing for 'teleporting' the camera.
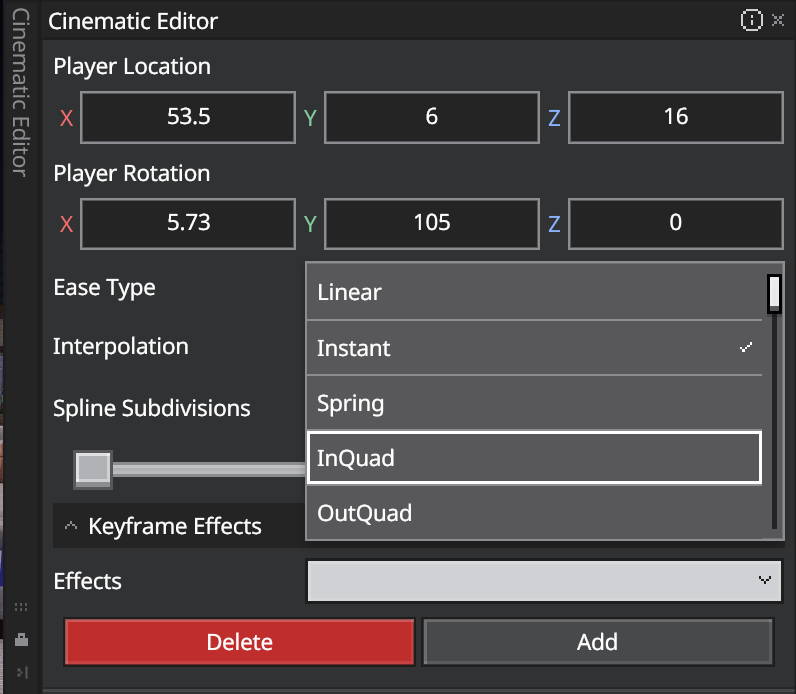
The 'Ease Type' button adjust the ease of a keyframe, different ease type allows the camera can move from one place to another with different motion. Which different ease types allows us to make the transition more natural in some scenes.
The following easing types are supported in the cinematic editor extension:
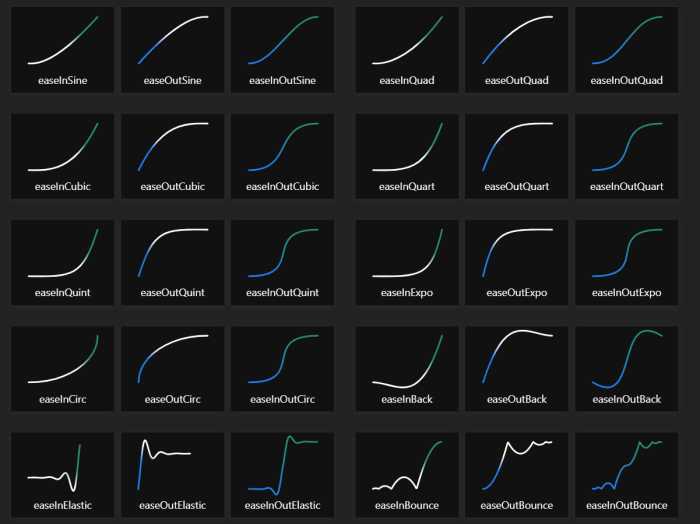
Tip
The image above is taken from Easing Functions Cheat Sheet (easings.net). Check out the website to learn more about different methods of easing.
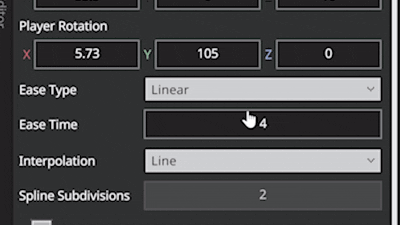
The 'Ease Time' adjust the time duration from one key frame to another.
These two options are automatically saved to world, so data will not be deleted when leaving and joining the world.
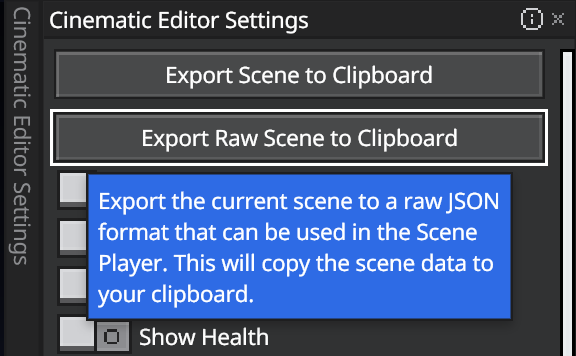
And finally, the Export Scene to Clipboard and Export Raw Scene to Clipboard buttons copy the scene data to clipboard, which you can play the scene outside of editor mode.
Note
Currently, the exported scene data can't be imported or used in Cinematic Runtime Add-On. This feature is planned for future updates.
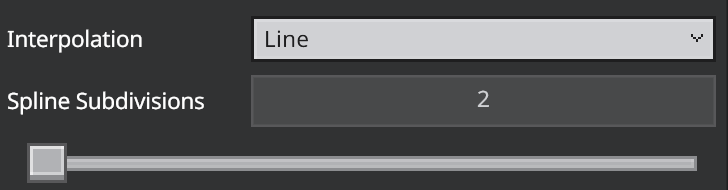
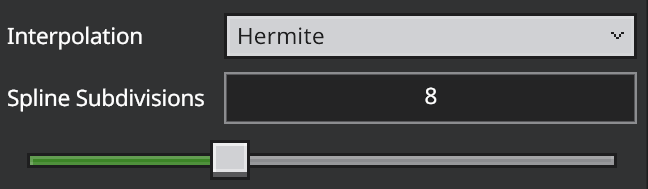
Interpolation
Interpolation is the general process of generating values between two points or keyframes. This can create natural-looking motion between multiple keyframes.
Currently, the editor supports these interpolation methods:
-
Linear / Line: The simplest method of getting values at positions in between the data points.
-
Hermite: Creates subdivision between multiple positions to create smooth, controlled camera paths.
Note
- Hermite interpolation requires to be set on at least 3 consecutive keyframes to work.
- Use 7-9 subdivisions for smoother camera movements and better client performance.
Keyframe Effects
In Cinematic Editor V2, you can find, apply, adjust fade effects, and run commands using the Effects panel.
Multiple effects can be added to a keyframe by pressing the add button, and remove it by pressing the delete button.
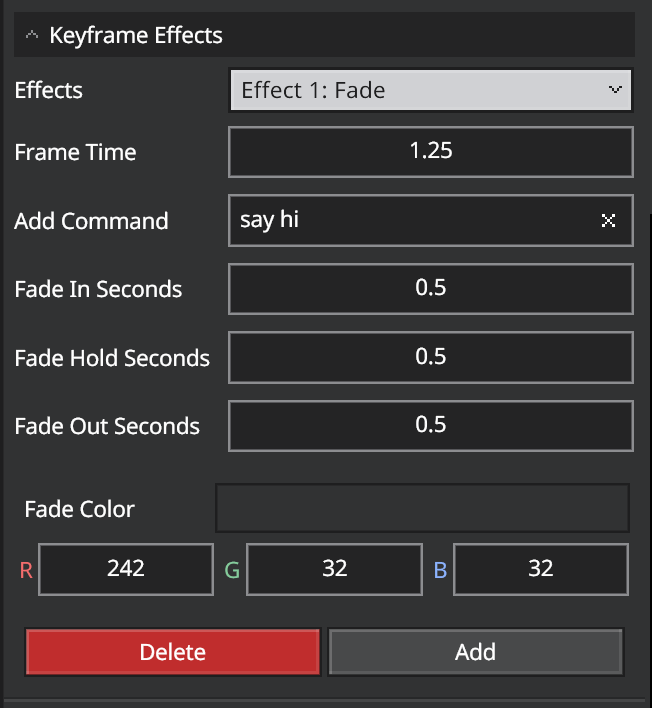
The keyframe effects panel is shown when you add and select an effect of a keyframe.
Each effect has a set of 5 parameters that can be adjusted to customize the effect.
- Frame Time: Set's the time when the effect starts, once the keyframe is reached.
- Add Command: Runs a command when the effect is triggered.
- Fade In Time: The duration it takes for the effect to fade in, in seconds.
- Fade Hold Time: The duration it takes for the effect to hold its final value, in seconds.
- Fade Out Time: The duration it takes for the effect to fade out, in seconds.
- Fade Color: The color the effect fades to.
Modifying Existing Keyframes
If you want to change the keyframe's ease, you can select a keyframe from the Keyframes dropdown. The panel will show easing details for the selected keyframe.
You can modify the ease type and the ease time for the keyframe. However you cannot modify it's position and rotation. You would have to delete the keyframe using the 'Delete Keyframe' button, then create a keyframe again.
Scene Action
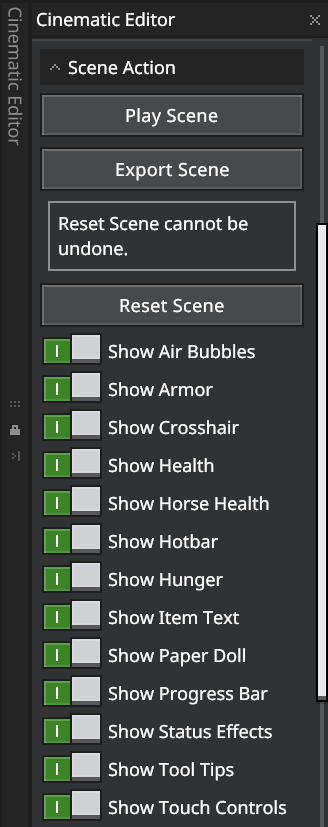
The Scene Action section in the extension panel allows creators to either play the scene, export the scene to Cinematic Runtime Add-On, or reset the scene.
Play Scene
This will play the scene which is stored in the Cinematic Editor Extension Add-On. To play a scene stored in Cinematic Runtime Add-On, use the Scene Player item.
Export Scene
Important
The import feature will be available in a future update.
Scene export allows you to transfer the scene details from the Cinematic Editor Extension to the Cinematic Runtime Add-On. This means you can play the scene with the Scene Player item available from the Cinematic Runtime Add-On without the Minecraft Editor or the extension.
The scene export feature currently supports multiple formats.
Year 2025 format (Recommended)
The new scene format which stores all keyframe data for the scene in a structured format. This format is designed to be more efficient and easier to work with in the Cinematic Editor V2 engine.
Year 2025 raw format
The new scene format which stores all keyframe data for the scene in a raw format. This format is the completely unmodified uncompressed original scene data that was loaded into the Cinematic Editor V2 engine.
Year 2023 format (legacy)
The legacy scene format used in Cinematic Editor V1. This format stores simple keyframe data for the scene. At the moment, it's only available in Cinematic Editor V1, and the format supports the import feature in Cinematic Runtime Add-On.
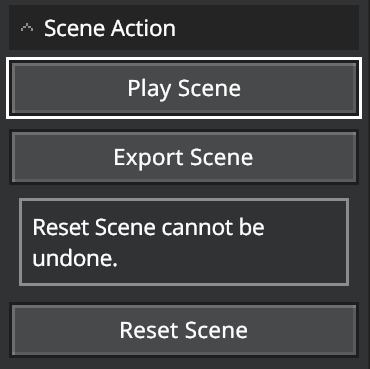
Reset Scene
This action will reset all data of the camera scene from the Editor extension, and it cannot be undone once the scene is removed. This does not affect the scene in Cinematic Runtime Add-On.
Hud Elements Visibility
The toggles controls the HUD visibility when playing a scene using the extension. There are multiple toggles under the action buttons which indicates the HUD elements to display when playing a scene.
Show Hunger- Shows hunger bar element.Show Paper Doll- Shows'paper doll' on-screen representation of the player.Show Armor- Shows armor element on the HUD.Show Tool Tips- Shows tool tip elements of the HUD.Show Touch Controls- Shows touch controls elements of the HUD. Depending on the players' platform, these elements may never show up.Show Cross Hair- Shows cross-hair section of the HUD.Show Hotbar- Shows hotbar inventory area element of the HUD.Show Health- Shows health element of the HUD.Show Progress Bar- Shows progress bar element of the HUD.Show Air Bubbles- Shows air bubble status element of the HUD.Show Horse Health- Shows visual representation of the players' ride element of the HUD.Show Status Effects- Shows status effects element of the HUD.Show Item Text- Shows item text element.
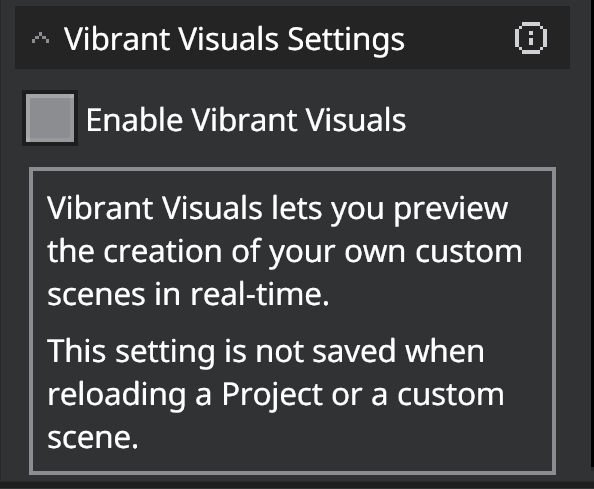
Vibrant Visuals Settings
We brought the Vibrant Visuals toggle from the Vibrant Visuals Panel into the Cinematic Editor panel. The Vibrant Visuals Settings panel lets you preview the creation of your own custom scenes in real-time when enabled, just like in the main editor.
Note
This setting is not saved when reloading a Project or a custom scene.
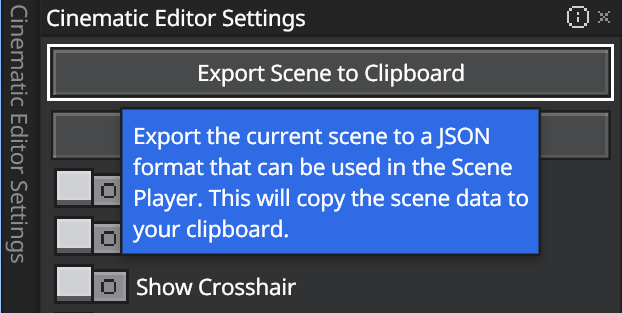
Export and import scene
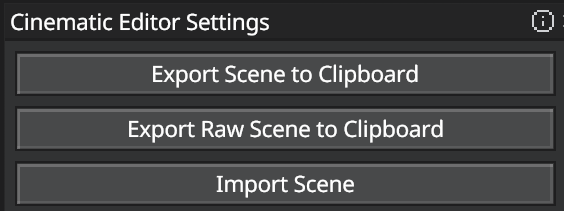
Export the scene by going into Editor settings panel, which can be accessed on the top of the editor.
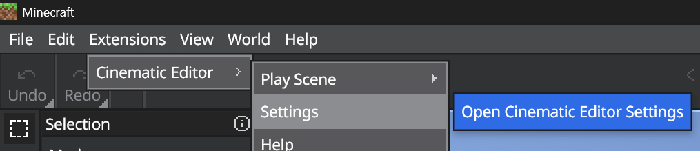
Then press Export Scene to Clipboard or Export Raw Scene to Clipboard.
Import the scene by clicking on the Import Scene button.
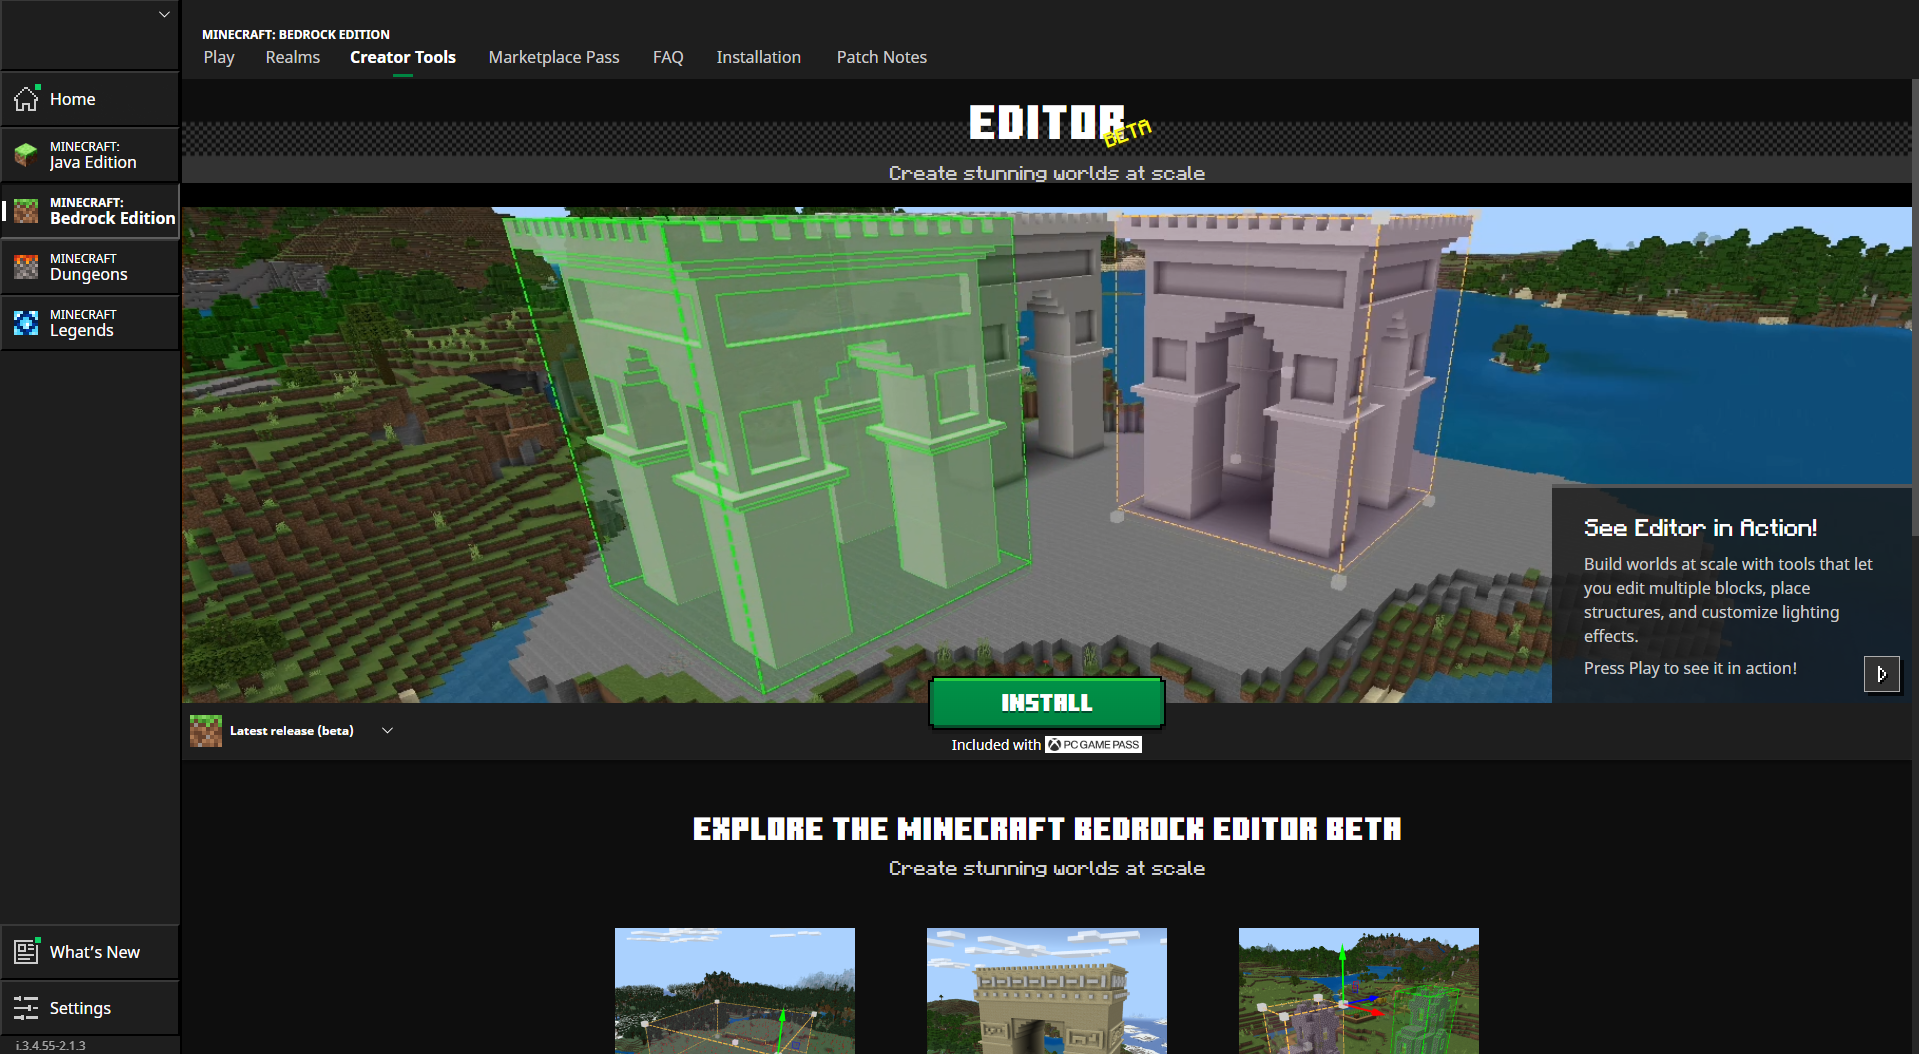
Installation
- Download files CinematicEditor_v2.x.x.mcaddon to access Cinematic Editor new V2 features.
- Close Minecraft if you have it open. Double click on the MCADDON file to launch Minecraft and import the add-on to Minecraft.
- Close Minecraft, then launch Minecraft Editor mode from either the Minecraft Launcher or a shortcut.
You can launch it either directly from the Creator Tools tab in the Minecraft Launcher or by creating a custom desktop shortcut that uses the command minecraft:?Editor=true.
Important
-
Cinematic Editor Extension requires Bedrock Editor mode to be enabled, which the engine is only available to Windows 10/11 players. Check out this article to get access to the Editor.
-
You are allowed to repost this add-on to other websites or make a YouTube video for commercial purposes, provided that you must put the link this post https://jaylydev.github.io/posts/cinematic-editor/ in the description of the video or a webpage and must not have any other direct-download links.
Downloads
Cinematic Editor is available for download in the following websites: